Menu Page Instructions
Welcome to the menu page instructions. See the following steps to add a new daily menu.
Please login in order to view the necessary steps.
Adding a daily menu
Here is the process for adding a new daily menu (Lunch or Dinner) to the website. This process will allow you to post an updated menu on the site and also a printable menu file in one step.
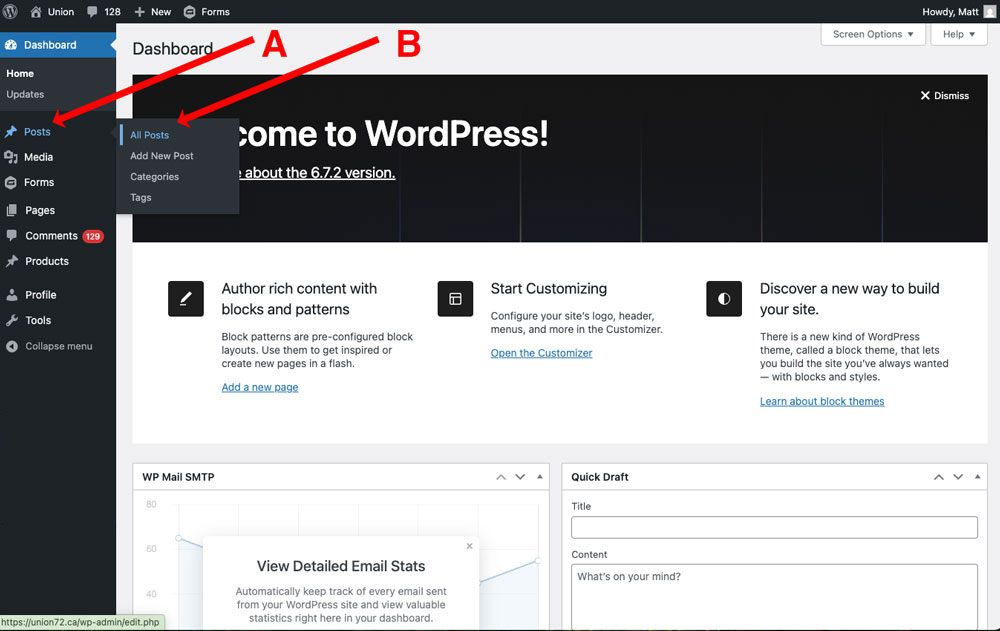
1. Open the "Posts" menu
Once you are logged-in as a user click on "Dashboard / Posts (A) / All Posts (B)"
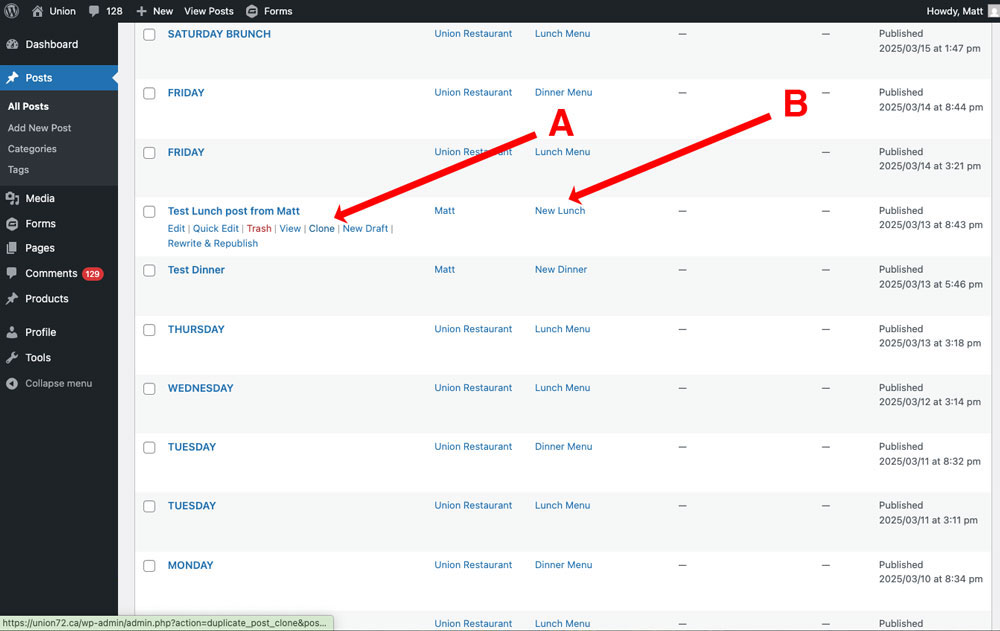
2. Select A Post To Base The New Post On
Select a post (usually previous day's post) and click "Clone" (A). Note - clone a post from the appropriate category (B) ie. "New Lunch" or "New Dinner".
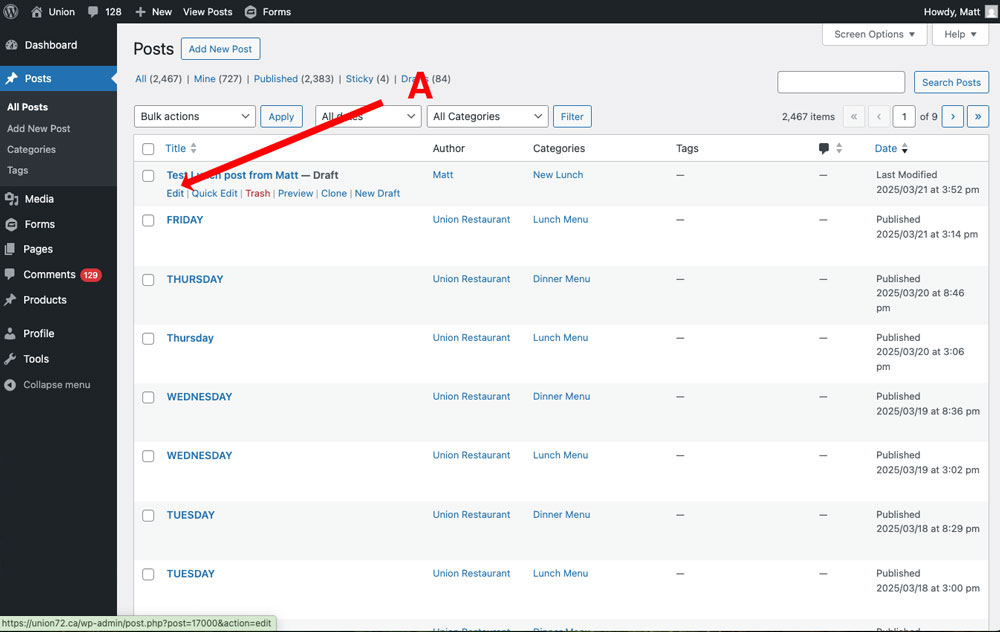
3. Edit the post
Click on "Edit" (A) to edit the newly cloned menu post
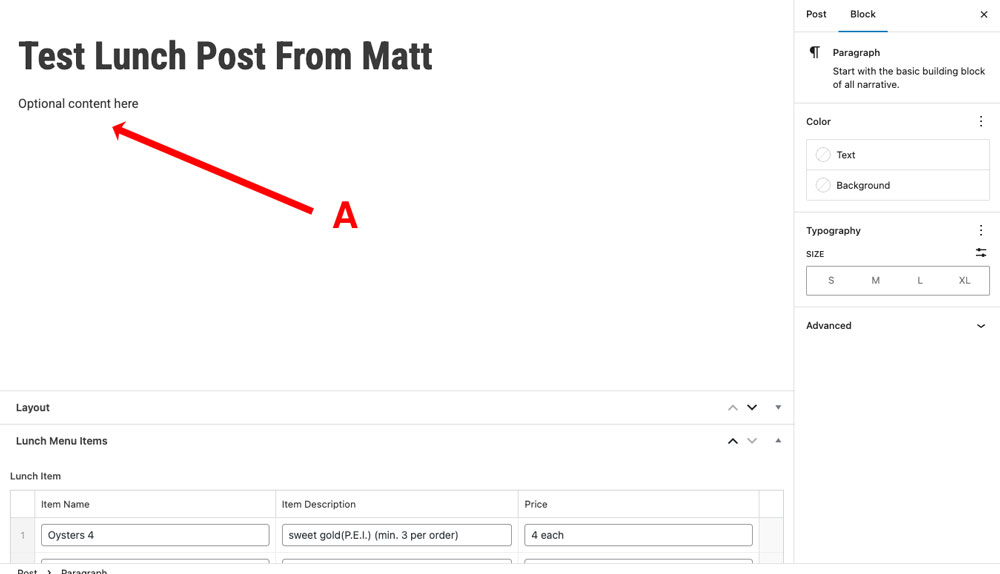
4. Add Optional Descriptive Menu Copy
This area (A) will populate an optional description area of the menu with a message (ie. "We are offering a special spring menu today").
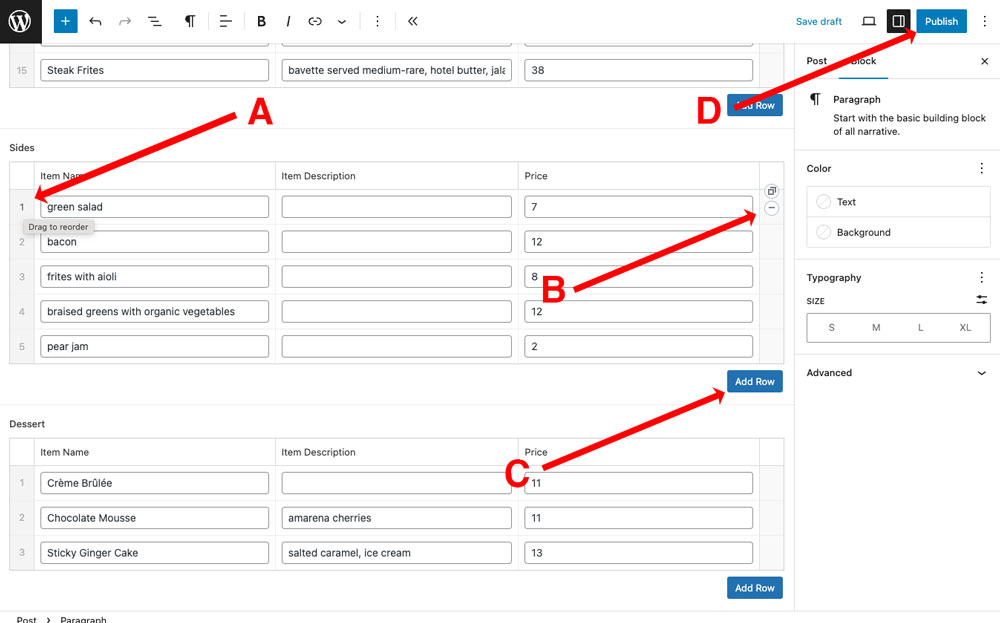
5. Edit The Menu
The actual menu area shows the menu sections (ie Sides, Mains, Dessert). In this area you have the option to reorder (A) by dragging the menu item, delete item (B) by clicking the minus or adding a new item by clicking "Add Row" (C). Each menu item contains the Item Name, Description and Price. These areas can all be edited. When the menu has been edited click "Publish" (D) to finish the menu creation.
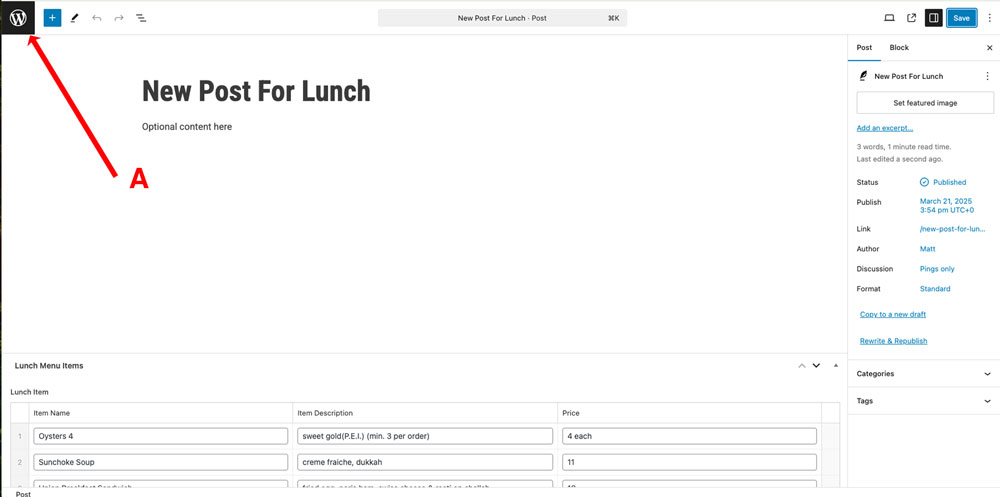
6. Print Daily Menu
Navigate back to the main admin area by clicking the the "W" in the top left corner (A)
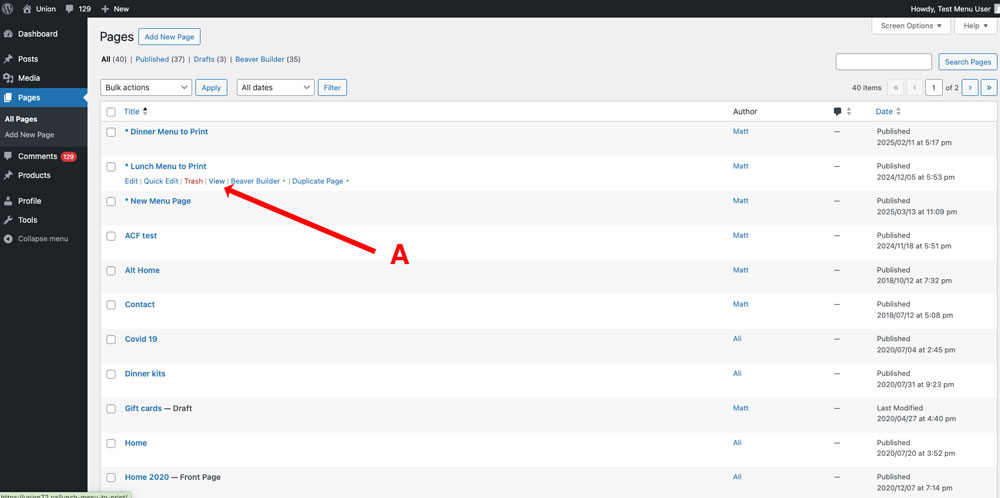
7. Navigate to the page to print lunch or dinner menus
Navigate to the page to print lunch or dinner menus - Click on "Pages". Hover over the "* Lunch Menu to Print" (or dinner). Click "View" (A)
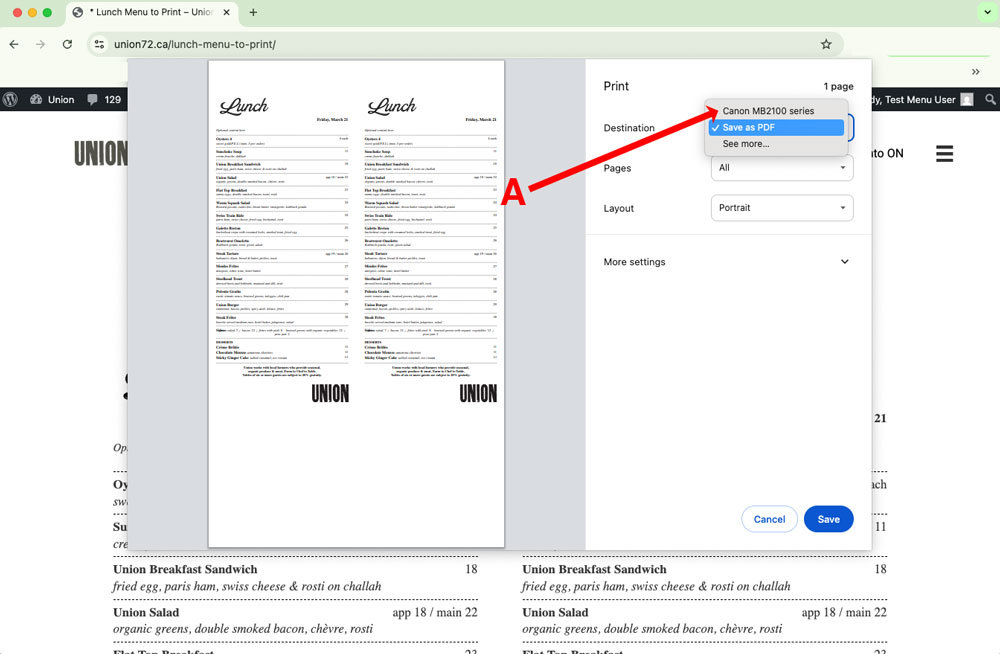
Print the Page
Once the page is open simply click File / Print from your browser window. From the print menu select the appropriate printer and "Print".
You are done!